Mini Cameras have taken over the everyday wildlife market by storm. Many 'ordinary' people can now buy and set up a wildlife camera in their own garden with the ability to watch it on their television or computer. This is a small guide to getting your own mini camera for exciting pictures and stories that will keep you gripped from your very own garden. In fact its so easy to do this yourself I'd be surprised if you haven't already. Minicams are so versatile these days and with so many options available it can be quite overwhelming, there are a few things you have to take into consideration so continue reading to find out more.

The Type of Camera
This isn't just the size or shape of the camera but also how you want it to work. Most mini cameras can be picked up on the web for a cheap sum getting more expensive as the quality increases. If your looking to place a camera in an underground den or have it operating during the night, you will almost certainly need infra-red led's. Most cameras come with these but make sure when buying they aren't dummy LEDs. Depending on where you want the camera, effects which one you should buy, for instance 'bullet cameras' can be put down a tube into a animal den ( Do Not do this without a trained or experienced professional). Small cameras can be placed in restricted places and wireless cameras offer a answer to less wiring. The main types of mini-cam are wired and wireless cameras, below we've made a list of advantages and disadvantages for both.
| Wired: Advantages: - Hardly loses any quality - Clear sound and video - Often Cheaper than the wireless option - Can get Pan and Tilt cameras - Power carried in same cord as the signal Disadvantages - Cable could be chewed through - Have to make a hole in the wall to get it into the house - Fixed to a particular area (however can be overcome) - Cabling the camera is time consuming  | Wireless: Advantages: - Can be used where cables can't be used e.g. across roads - No hassle of cabling - Can be used in more discreet places - Easy Installation - Can cover long distances Disadvantages: - Often more expensive than wired - Signal can be Interrupted by walls or buildings - Often larger body to occupy the wireless transmitter - Transmitter and receiver must maintain line of sight 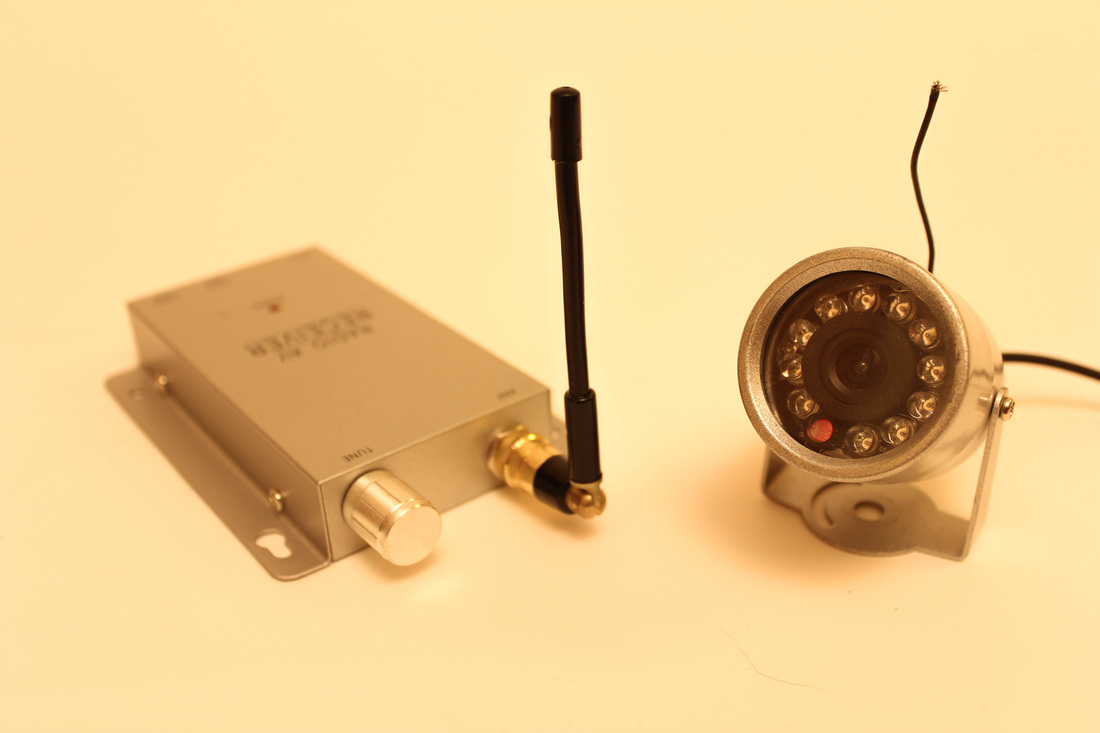 |
Cabling
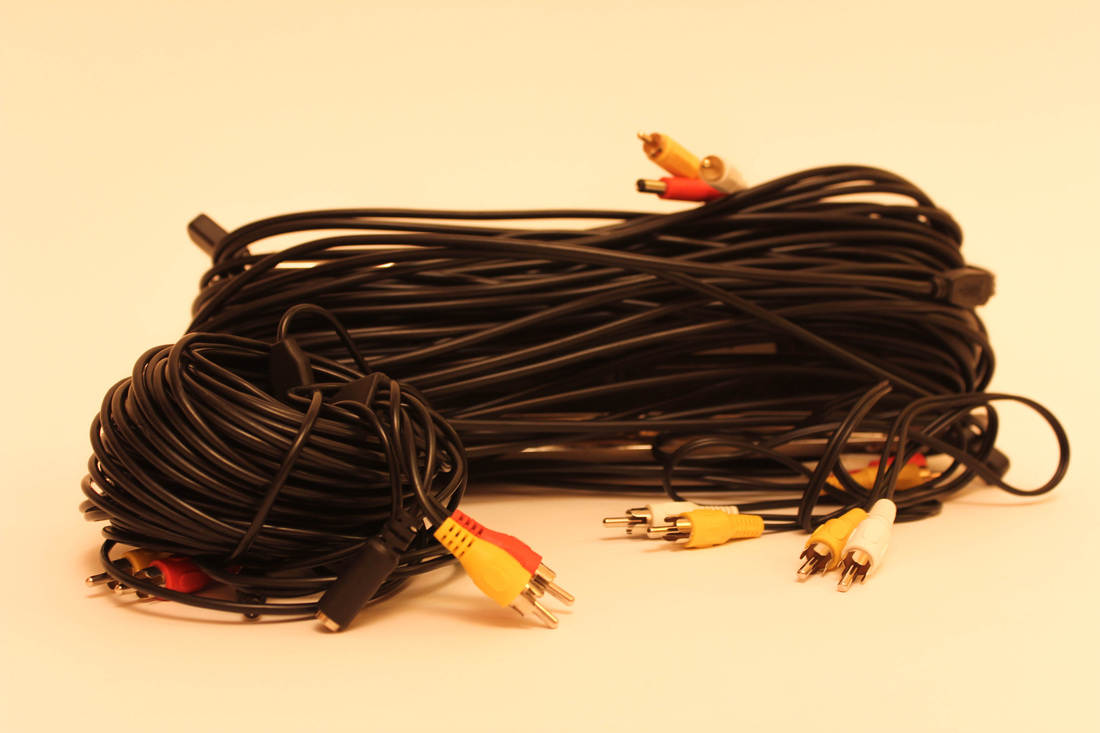
For Wireless cameras they need a power cable going to the camera itself, and then short RCA cables and a power cord at the receiver. Wired Cameras are different however, and need different sized/lengthed cables depending on the distance needed to cover. I personally have 40m and 20m cables as these two provide enough length for most jobs, if I need longer (Most likely never) I can always attach them together. However one thing you must realize the longer the length the more likely you are to lose quality on the video.
I always wrap my cable around something like a block of wood so that it doesn't get tangled and can easily be unravelled when I need to use it. I would suggest doing this, especially for the longer cables. For short cables, like for the wireless receiver I normally just tie them up with an elastic band for storage space. When placing the wire in your garden try to pin it along fences or bury it, therefore a rodent won't be able to chew through the wire or a another animal get tangled in it. If a rodent does manage to chew through it it carries a low voltage so won't be too much of a problem, just annoying. It should be fairly simple to fix with a soldering iron and some insulation tape. These wires can be picked up online or in a store for a small sum.
I always wrap my cable around something like a block of wood so that it doesn't get tangled and can easily be unravelled when I need to use it. I would suggest doing this, especially for the longer cables. For short cables, like for the wireless receiver I normally just tie them up with an elastic band for storage space. When placing the wire in your garden try to pin it along fences or bury it, therefore a rodent won't be able to chew through the wire or a another animal get tangled in it. If a rodent does manage to chew through it it carries a low voltage so won't be too much of a problem, just annoying. It should be fairly simple to fix with a soldering iron and some insulation tape. These wires can be picked up online or in a store for a small sum.
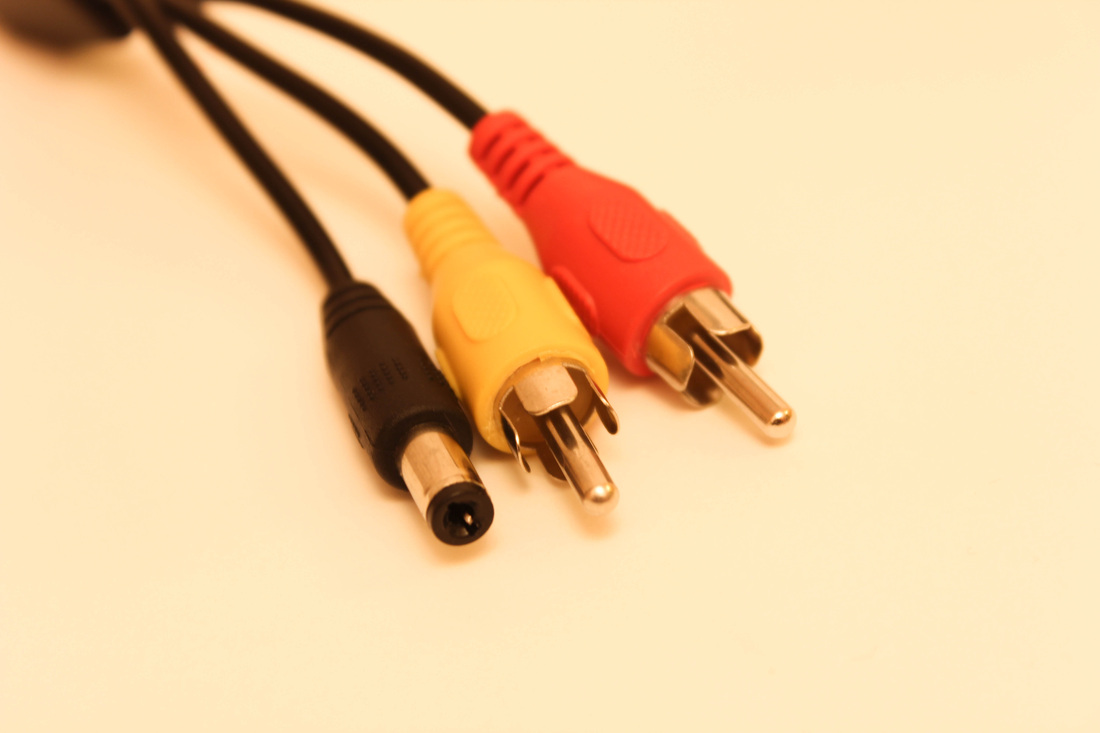
The pictures below show the two ends of a typical cable, the left hand side shows the end that attaches to your camera. The black plug is the DC power which just plugs straight into you camera power socket, the yellow lead connects to the cameras yellow lead input and the red lead on the wire connects to the audio socket which will either be red or white - alternatively the cable may come with a white connector rather than a red one. The right hand side shows the end of cable that you want to be where your TV or computer is. You connect the wall plug into the black socket and then insert the other two into the RCA sockets in your TV or PC.
Be careful when choosing the cable, first check the diameter of the DC plug, for instance the cable may be for a 2.1mm plug so make sure the camera is made to accept a 2.1mm plug! Some cameras come with a different type of cabling where another type of cable will need to be bought, check first.
Be careful when choosing the cable, first check the diameter of the DC plug, for instance the cable may be for a 2.1mm plug so make sure the camera is made to accept a 2.1mm plug! Some cameras come with a different type of cabling where another type of cable will need to be bought, check first.
 |  |
Connect to your TV or PC
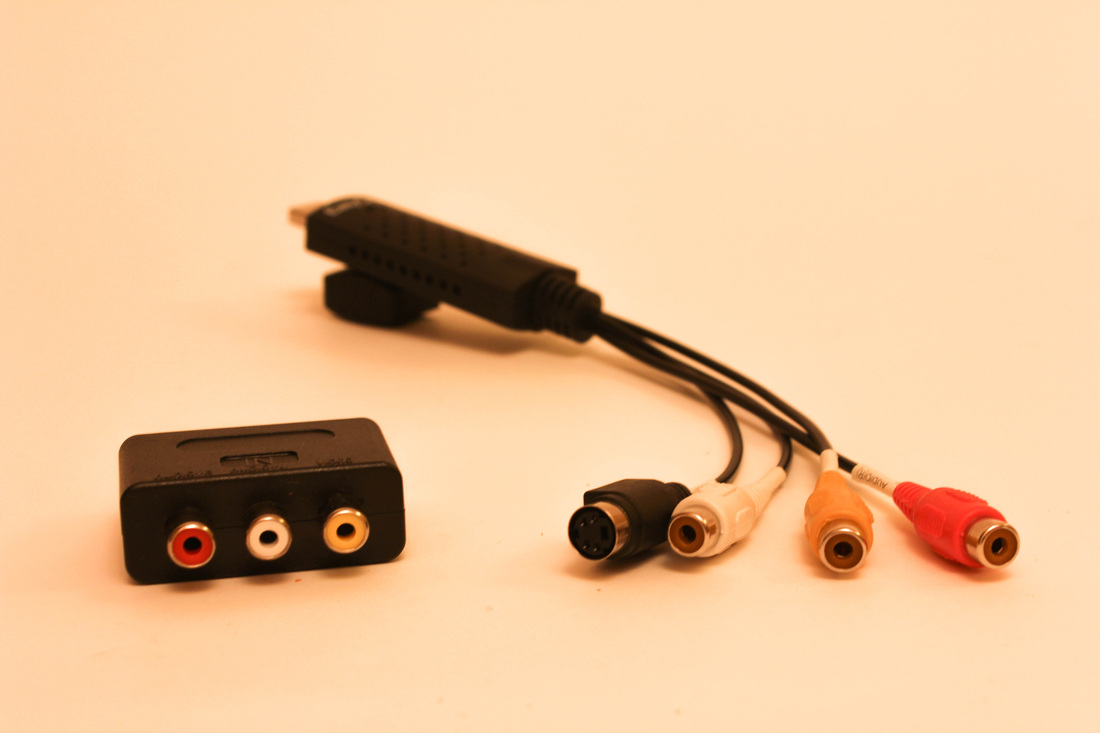
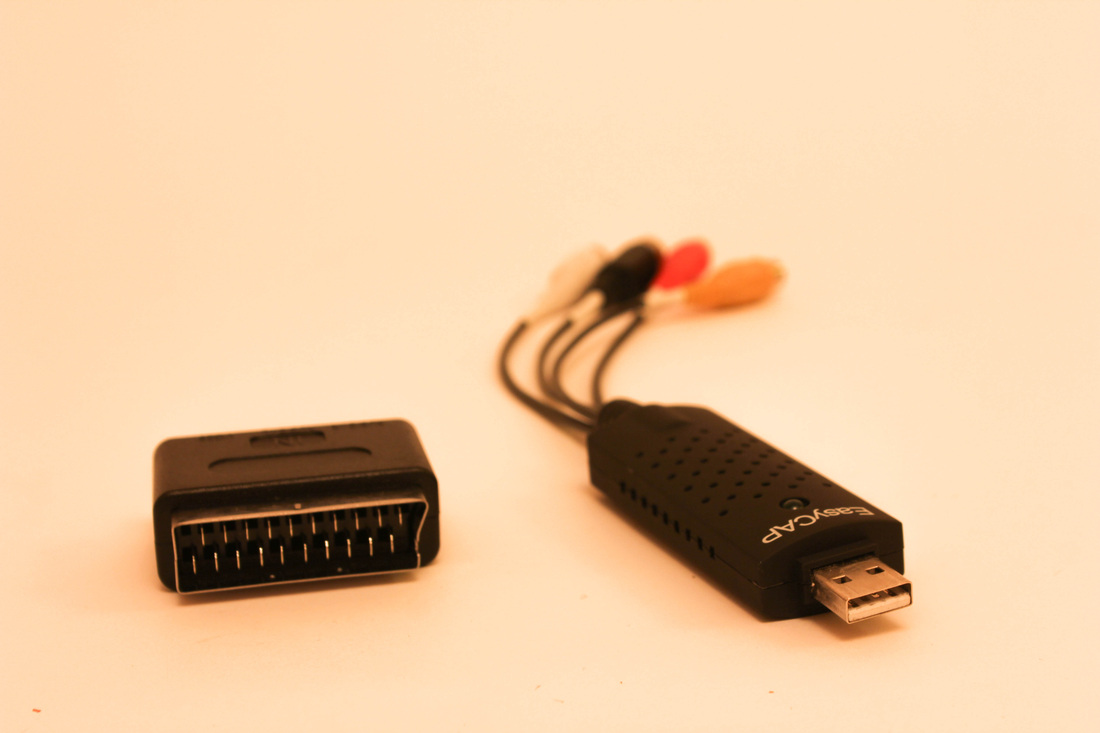
Sometimes if your lucky or spend a bit more you can pick up a RCA to Scart adaptor, this means that you can connect it to your TV if you don't have a RCA input or if it's already in use. The scart socket can often be found in the back of the television and will show the live images on one of the AV channels. Just connect the colours on the camera cable to the colours on the scart adaptor and don't worry if you have either the white or red socket spare. (Red and White = Audio, Yellow = Video). If you want to however connect it to your PC or Mac you almost indefinitely need to purchase a RCA to USB adaptor. I use the 'Easy-Cap' one which for around a fiver comes with a free capture software/program too. One thing to be aware of though is that the USB adaptor will only work in the USB port you installed it originally in. If you have a Mac make sure it can be used for 'Apple' computers. Below the pictures show the RCA to Scart adaptor on the left and the RCA to USB adaptor on the right.
 |  |
Housing
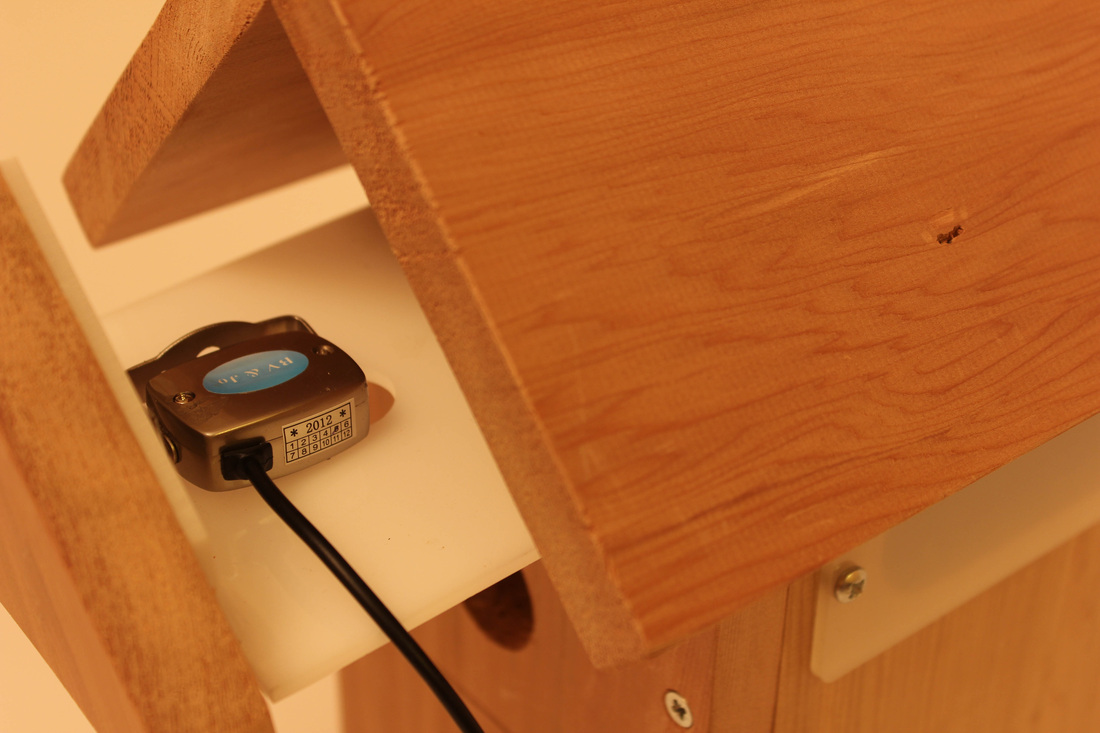
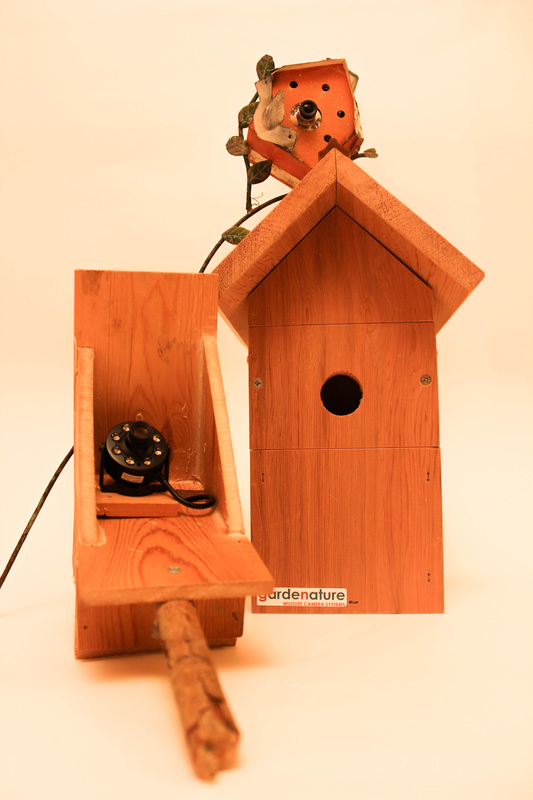 | Mini cameras are great, but there pretty pointless without good housing. Housing is important to get great images without disrupting or destroying a habitat or the camera. Most cameras aren't waterproof and so housing is an essential. When buying a camera you can also choose the option to get a bird box and feeder camera holder. This is obviously adding more to the cost ranging from £50 and upwards. I made my own feeder camera housing to protect the camera using wood and a few nails. The wiring is all enclosed at the back of the box. Mounting the box means you have to attach it to a tree using wires/straps, best not to screw in on a young, or thin branch. I used a firewood branch attached to the box that can be placed on an old bird feeder pole, letting me adjust the height and direction of the camera. Many of you however will buy a camera to use in a nest box, I personally don't like the idea of building a nest box for use of a camera and so bought mine from Garden Nature for a price which gives you a good quality product made to the RSPB and BTO standards. The best quality for a young family of birds, meaning you don't have to worry about your handiwork falling apart. This nest box provides perspex windows to allow enough natural light in and a slide out tray (as shown below) for the camera meaning the chicks aren't exposed to the wiring. |
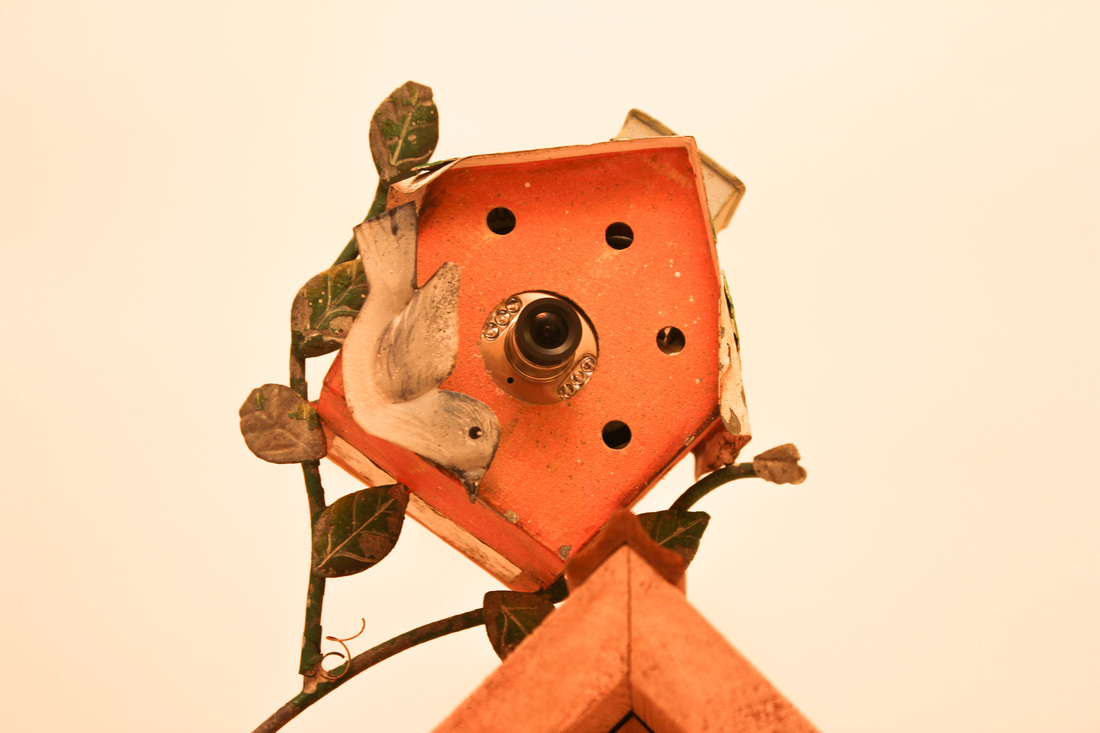
Also don't be afraid to use ingenious ways of mounting your camera in a housing. Below shows an old outdoor candle holder that fits my mini-cam perfectly to observe activity close to the ground. Housing depends on what you want to use the camera for, often for feeding stations it is good to build your own housing, a great example of DIY is Wildlife Kate's camera projects such as 'Clay Cavern' and the 'log feeder'. My only advice is please, please, take into consideration the animals welfare. Don't install cameras in a nest box whilst it is in use, even if the eggs haven't hatched!
Things to look out for when buying
Does the camera come with a wall adapter - It can be very annoying to order your camera with it to only arrive without a power source, often the difference in price between one with a power source and one without is minimal.
Viewing Angle - This is so important especially if you want to use your camera in a nest box, the viewing angle determines whether you can see into all the corners or only a very small portion of what you could see. Mainly I would suggest going for a wide angle of about 70 degrees so that you can use the camera in a nest box and other projects without the worry it may not show enough of what you want to see. I've bought a camera with a viewing angle of 32 degrees - not knowing - only to realise it won't work in my nest box. Be Aware!
Audio - Many people don't realise how important audio is, good audio is the key to good video. Most cameras come with a small mono microphone and this is often shown by a red or white RCA lead on the cable coming out of the camera. Look for the three leads as mentioned above. If the camera doesn't come with audio you can always buy an additional mini-mic, however this is an additional cost that could be avoided.
Infra-red - This is important for night vision, check the camera has a good amount of LEDs in order to illuminate a larger area, often the range of infra-red is included in the specification, otherwise don't be afraid to sent an email and ask. It's always better to be sure of what your buying so not to waste your money. Sometimes though a small range is needed such as in nest boxes and other contraptions so go for a mini-cam with less LEDs.
More Links
BBC Blog - http://www.bbc.co.uk/blogs/natureuk/2010/06/how-do-the-minicams-team-do-it.shtml
More advanced minicams - http://www.bbc.co.uk/academy/collegeofproduction/videos/tv/tips_minicam_tv
Wildlife Kate's range of minicam housing - http://www.wildlifekate.co.uk/#/live-stream-cams-spring/4560980425
How to set up a nest box camera 'Wildlife Whisperer' - http://www.wildlifewhisperer.tv/videos/shorts/414
BTOs Nest Box essentials - http://www.bto.org/nnbw/essentials.htm
If you have any questions just contact me on twitter or email through my contact page
 RSS Feed
